Composting at home can be easy. It should be neither complicated nor smelly if it’s done right. And your garden will love you for that! Compost, or “the black gold”, is a gift that keeps on giving, as you can reuse it over and over again. All you need is to get started. And we’re going to do just that!
Benefits of composting
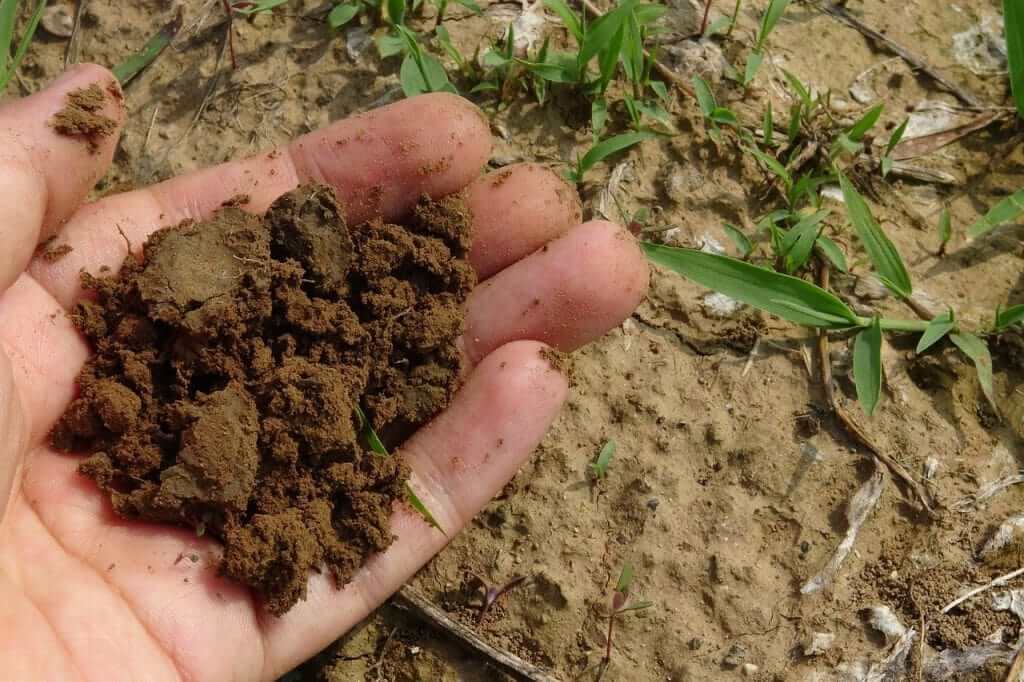
You’ve probably heard about all the benefits of composting, but we can’t get enough of them! Compost is an excellent alternative to over-the-counter plant fertilisers. It will provide your plants with many nutrients, keep the chemical balance, and help with soil moisture retention. That’s especially needed with sandy and clay soils, with which many Australian gardeners struggle with. The newly introduced beneficial microorganisms will aerate the soil and keep your garden healthy. If you don’t know about soil aeration, read our article about it.
Organic waste makes up around 35% of all household rubbish (or even more if you’re going Zero Waste), so materials will never be sparse. Reducing waste should always be welcomed!
Composting saves you money while making something good for your garden. What more can you ask for?
How to compost
Step 1. Choose a composting method
The first step to start composting is choosing the method. There are generally two methods – cold composting and hot composting. Both have their pros and cons. Choose whichever suits your situation. How fast the compost matures depends heavily on the method (and other factors), and it can take anywhere from several weeks to up to two years.
Cold composting method
In cold composting, you add organic material to the compost pile without turning it. You still need to alternate layers of browns and greens. Sounds easy, right? You’ll be surprised to learn that not everyone likes this method. That would be because the maturation period is lengthy – creating useable compost material can take 6 months to 1 year or longer.
The method is most suitable for people who have enough space in the garden to set up a cold composter and also like the simple, slow, and natural approach.
Hot composting method
Hot composting might be demanding but will reward you with ready compost in a month to a year. It’s also a preferred method by people who don’t have much space for a composter but would still like to compost.
As the name suggests, there’s heat involved. It comes from the microorganisms and fungi that are developing inside the compost and breaking it down. The pile can heat up in 24 to 32 hours and will retain the heat for a few days up to a week. A plus side to the high temperatures is that everything undesirable (weed seeds, disease pathogens, pest eggs) will not survive in the compost pile.
If you choose this method, you should know that the optimal temperature is around 60°C. If it increases to 70°C or beyond, it might throw off the balance of your compost. You can easily lower the temperature by turning the pile and adding water. There are compost thermometers that are easy and cheap to obtain. We suggest you arm yourself with one.
Step 2. Set up the composter
After choosing the composting method, now is the time to get your composter set up. The open ground composter uses the slow and steady method of cold composting. The bin composters use the hot composting method. There’s a myriad of variations of the compost bins. We’re presenting you with a favourite of many – the three-bin system. Let’s take a look at how to set up each composter.
Open ground composter
- Choose an appropriate location in your garden for the composter.
- Start your compost pile on open ground. This way, beneficial critters like worms could get into the compost, enriching it with enzymes.
- Set up a base for your compost pile by layering twigs or other harder materials at the bottom. This will ensure the pile has good drainage and will improve the much-needed oxygen intake.
- Layer the materials as you add them to the compost. A good rule of thumb is to alternate between green and brown, moist and dry. Ensure the ingredients don’t clump together because this will make it very hard for the compost to aerate and mature. Any powderlike ingredients like sawdust or wood ashes should be added in small layers.
- Add green manure to the pile, or anything rich in nitrogen really. The importance of manure comes from the microorganisms already living in it. This will “activate” the compost, further speeding up the maturing process.
- Remember to keep the pile moist but not soggy. Water it occasionally, but be careful not to overdo it.
- Cover the pile with whatever you have on hand. This will retain the two most important things for compost – moisture and heat. Wooden planks over it work best as it also allows rainwater to do the moisturising for you without soaking it. If you prefer open-air composters, you can skip this step.
- Turn the pile with a pitchfork every few weeks to ensure it gets enough oxygen. Do this also when you add new ingredients to it instead of just layering them atop the old ones. Mixing the ingredients in is important for the homogenisation of the compost, which again speeds up its maturing.
Compost bins – the three-bin system
- Start the compost in one bin. Simple enough. Just throw in some organic matter (see below what kind is acceptable).
- Move the material when it starts maturing into a second bin. Keep it there until it’s completely matured. You’ll know it’s ready when it’s dark brown, crumbles, and smells like earth.
- Keep the ready-to-use compost in a third bin. This way, you have a rotation that ensures you are always stocked up on black gold. You can start using the compost in your garden!
Step 3. Know what to compost
As you’ll find out, almost any organic matter can be composted. The exceptions are below.
You should keep equal amounts of browns (dead leaves, twigs) and greens (grass clippings, food scraps). The brown materials provide carbon, and the green – nitrogen. These are the most important elements to compost (along with water), with the perfect balance being 25:1 carbon to nitrogen.
Having this in mind, here’s what you can throw in your compost:
| Fruit Scraps | Nitrogen | Add with dry carbon items. |
| Vegetable Scraps | Nitrogen | Add with dry carbon items. |
| Grass Clippings | Nitrogen | Add in-between in thin layers. |
| Seaweed and Kelp | Nitrogen | In thin layers; mineral source. |
| Chicken Manure | Nitrogen | Very good “activator”. |
| Weeds | Nitrogen | Watch out for seeds! |
| Table Scraps | Nitrogen | Add with dry carbon items. |
| Coffee Grounds | Nitrogen | You can use seeds too! |
| Flowers and Cuttings | Nitrogen | Add them chopped up. |
| Leaves | Carbon | Shred them to compost faster. |
| Shrub Prunings | Carbon | Woody stems compost slower. |
| Straw or Hay | Carbon | Straw is better. |
| Pine Needles | Carbon | Use moderately as they are acidic. |
| Wood Ash | Carbon | Shrub prunings. |
| Sawdust Pallets. | Carbon | Straw or hay. |
| Wood Chips/Pallets | Carbon | Pine needles. |
| Dryer Lint | Carbon | Wood ash. |
| Cardboard | Carbon | Manure. |
| Corn Cobs, Stalks | Carbon | Chop them up before adding. |
| Shredded Paper | Carbon | No glossy paper. |
| Garden Plants | Both | No diseased plants. |
| Eggshells | Neutral | Crush them before adding. |
Step 4. Know what not to compost
Do not compost any animal remains or animal products, or you’ll get an unmistakable stench in your garden. Not only that, but it can bring undesirable bacteria into the compost. And you don’t want that. Especially if later you’re going to use the same compost to fertilise your crops.
Things you should not add to the compost include:
- Meat and dairy
- Fat
- Diseased plants
- Bread or similar products as they attract pests
- Metals, plastic and glass
- Magazines
- Sawdust from treated timber
Be extra careful if you are going to add weeds to the compost if you are using the cold method. Check them thoroughly for seeds because you may end up spreading them all over your garden.
Takeaways
- Assess your space and personal preferences when choosing composting method.
- DO your research on what to compost.
- DON’T compost animal derivatives (eggs are an exception).
- Remember that composting may sound complicated, but it really isn’t anything more than layering rubbish in a pile and letting it ripen.